
-
×
 Ida with cat at her feet Babushka Matryoshka nesting Doll 1 × $34.95
 -
×
Green glass small egg Coat of Arms 1 × $34.95
-
×
Dark Green glass medium egg floral ornament 1 × $69.95
-
×
Red glass medium egg Coat of Arms 1 × $59.95
-
×
Nata Bride in burgundy 5-set Babushka Matryoshka nesting Doll 1 × $189.95
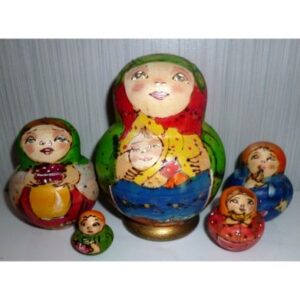 Ida with cat at her feet Babushka Matryoshka nesting Doll
 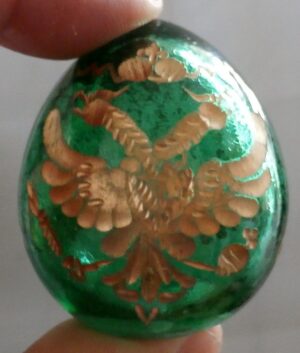 Green glass small egg Coat of Arms
 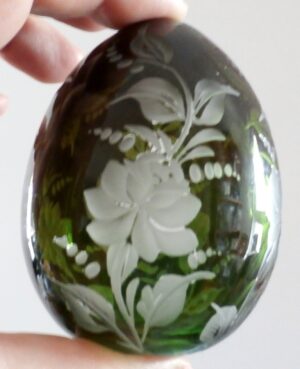 Dark Green glass medium egg floral ornament
 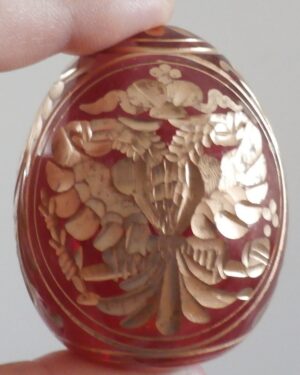 Red glass medium egg Coat of Arms
 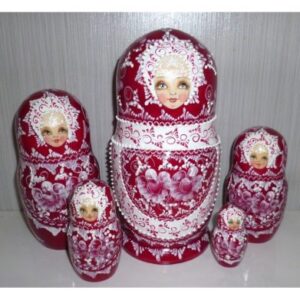 Nata Bride in burgundy 5-set Babushka Matryoshka nesting Doll
How to Paint Your Own Matryoshka Dolls: A Beginner’s Guide to DIY Blank Babushka Dolls
Turn a set of plain wooden nesting dolls into a one-of-a-kind family heirloom, gift, or craft afternoon — no artistic experience required.
There’s something wonderfully satisfying about picking up a paintbrush and turning a blank wooden doll into something entirely your own. Unpainted matryoshka dolls (sometimes called blanks) are one of the most rewarding craft projects out there — they’re forgiving for beginners, endlessly customisable, and the finished set becomes a genuine keepsake rather than something that gets thrown in a drawer.
Whether you’re painting alongside the kids on a rainy Sunday, designing a “family set” with mum, dad and the pets, or just after a relaxing solo project, here’s everything you need to know to get a beautiful result from your first attempt — plus where to find blanks in Australia.
Why Paint Your Own Matryoshka Dolls?
Traditional matryoshka dolls were always meant to be personal — each one telling a small story through its design. Painting a blank set lets you bring that tradition into your own home, with your own theme. Popular ideas include:
- The family set — biggest doll as mum or dad, working down through kids, and finishing with the family pet as the smallest doll.
- A gift for grandparents — a hand-painted set makes a far more meaningful nana or pop gift than anything shop-bought, and it lasts a lifetime on the shelf.
- A pet-themed set — turn your nesting dolls into your dog, cat, or favourite animal family, spots, patterns and all.
- A modern, abstract set — skip the traditional headscarf look altogether and go graphic, geometric or colour-block for a contemporary decor piece.
- A kids’ craft activity — simple shapes and paint pens make this an easy, mess-controlled project for smaller hands.
Tip: If you’d rather not paint from scratch, our Colour Me In range comes with a pre-drawn outline already on the doll — perfect for kids or first-timers who want structure to work within.
What You’ll Need
The good news is you don’t need a professional art kit to get a great result. Most of what you need can be picked up from any craft or hardware store:
- A set of blank, unpainted matryoshka dolls
- Paints — acrylic is the easiest and most forgiving for beginners, though gouache, tempera and even paint pens or fine-tip markers all work well
- A soft pencil for sketching your outline before you commit to paint
- Paintbrushes — a broad flat brush for base colours, a fine-tipped brush for detail work
- Fine-line permanent marker or paint pen for facial features and outlines
- Clear acrylic spray sealer or varnish, to protect and finish the dolls once dry
- Fine sandpaper, in case you need to smooth the rim where the two halves meet
If you’re painting with young children, paint pens or fine-tip markers are a great low-mess alternative to brushes — they dry almost instantly and give kids more control over fine details like faces.
Step-by-Step: How to Paint Your Blank Nesting Dolls
1. Plan your design and theme first
Before any paint goes on, line your dolls up from smallest to largest and decide what each one will represent. Sketching your rough theme on paper first — who or what each doll will be — saves a lot of second-guessing once you’re mid-brushstroke.
2. Sketch a light pencil outline
Using a soft pencil, lightly mark out the basic shapes on each doll: a circle for the head, a rough outline for a scarf or hair, and the general shape of any clothing or pattern. This gives you a roadmap without committing to anything permanent.
3. Start with a base colour
For your first set, it’s easiest to paint each doll in one or two solid base colours first (a light coat of white is a great primer-like base if you’re planning bright colours on top). Let this dry completely before adding detail — rushing this step is the most common beginner mistake.
4. Build up the details
Work from the largest areas down to the smallest: block in the face and any clothing shapes first, then move to fine details like patterns, buttons, or a scarf knot with a small, fine-tipped brush. Painting in this order — big shapes first, fine lines last — gives the neatest finish.
5. Add the face last
Faces are the trickiest part and where a fine paint pen or permanent marker often works better than a brush. Keep it simple — a soft smile and simple eyes go a long way. If you’re painting with kids, let them have creative control here; a wonky, joyful face is part of the charm of a handmade doll.
6. Let everything dry properly
Leave your painted dolls somewhere dry for several hours, ideally overnight, before handling them again or moving on to sealing.
7. Seal and protect
Once fully dry, finish with a couple of light coats of clear acrylic spray sealer or varnish. This protects the paintwork, gives the dolls a lovely soft sheen, and means your finished set will hold up to years of display (or little hands).
Important: Keep paint away from the rim where the top and bottom halves of each doll meet — a build-up of paint here is the most common reason nesting dolls stop opening and closing smoothly. A light sand of this edge before you start (and after, if needed) keeps everything gliding nicely.
Design Ideas to Get You Started
| Theme | Great for |
|---|---|
| Family portrait set (biggest to smallest, ending in the family pet) | Gifts for grandparents, keepsakes |
| Woodland / mushroom and forest characters | Kids’ bedrooms, nature lovers |
| Simple animal families | Beginners, younger kids |
| Modern geometric or colour-block patterns | Home decor, minimalist styling |
| Traditional Russian folk dress | Collectors, those wanting an authentic look |
Browse our Magic Forest & Mushrooms and Sets of Cuteness blanks for shapes that are especially well suited to woodland and animal themes, or the Pyramid blanks if you’d like to try a more geometric, modern design.
Not Just for Traditional Dolls
Blank wooden nesting shapes don’t have to end up looking like a classic babushka at all. Some of the most eye-catching hand-painted sets skip the headscarf altogether — think painted animal families, character sets, or modern colour-block designs that suit contemporary home decor just as well as a nursery shelf. If you’d like a smaller-scale project or an easy one to do with a group of kids, our Peg People blanks and Décor Boxes are a fun, faster alternative to a full nesting set.
Play Piece or Display Piece?
Decide early on whether your finished set is going to be handled and played with, or kept as a display piece — it changes how you approach sealing and how careful you need to be with the smallest doll. If little hands will be playing with the set, make sure the smallest piece is age-appropriate and always supervise play, as the tiniest dolls can be a choking hazard for very young children.
Frequently Asked Questions
What paint works best on wooden nesting dolls?
Acrylic paint is the easiest option for most people — it’s affordable, dries quickly, and covers well in one or two coats. Gouache and tempera give a more traditional matte finish if you want an authentic look, while paint pens are the best choice for kids or anyone after fine detail without a brush.
Do I need to prime the dolls first?
It isn’t essential, but a base coat of white or light-coloured paint gives truer, brighter colours on top, especially if you’re using lighter or pastel shades.
How do I stop the dolls from sticking after painting?
Keep paint and varnish away from the rim where the two halves join, and give it a light sand before you begin if needed. This is the single biggest factor in keeping your dolls opening and closing smoothly once finished.
Can I paint over an existing design?
You can, with a coat of primer first — but it’s far easier (and gives a better result) to start with a genuine blank, unpainted set designed specifically for painting.
Ready to Start Your Own Set?
Shop our full range of blank, unpainted matryoshka and babushka dolls — perfect for family projects, gifts, and craft afternoons.
Shop Unpainted DIY Dolls